


Photoshop: Create your own weather - Part 1
This marks the beginning of the "Create your own weather" series.
"Create your own weather" is a 4 part tutorial where I will share with you some of the techniques to transform a vanilla picture into have 4 contradistinctive demeanors. The series will attempt to re-create an array of nature's weather fronts and instantly change the mood of a picture's landscape - add a rainbow; capture a lightning when it strikes; portrait windy weather; and perhaps a tornado.
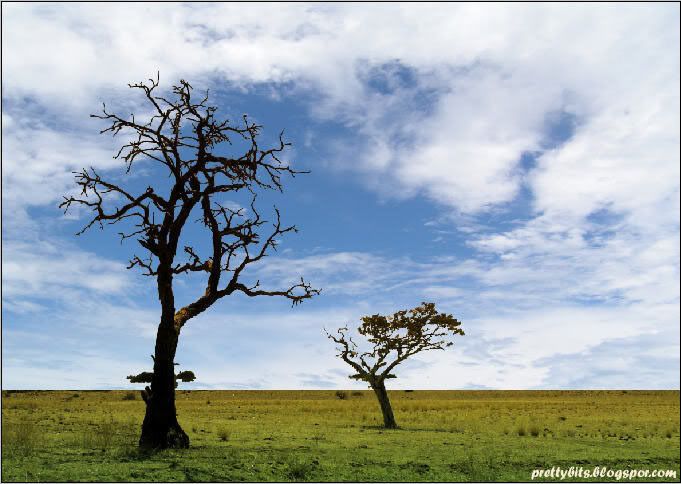
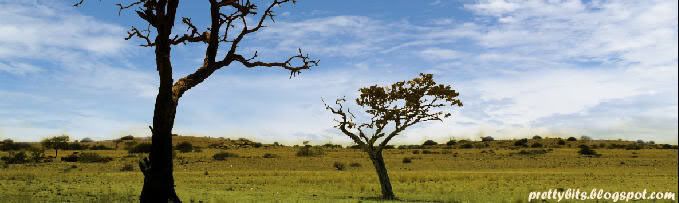
In part 1, we will look at how we can transform this...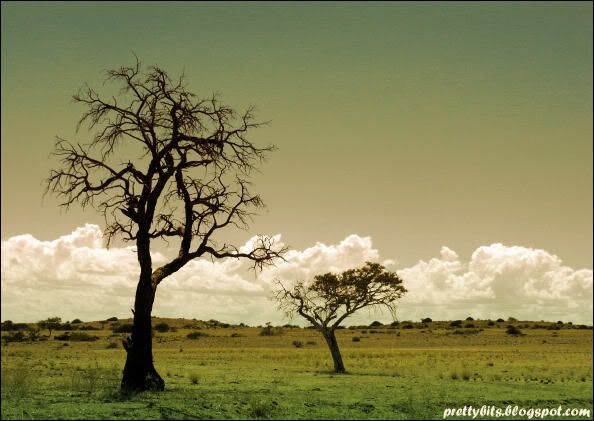 to this...
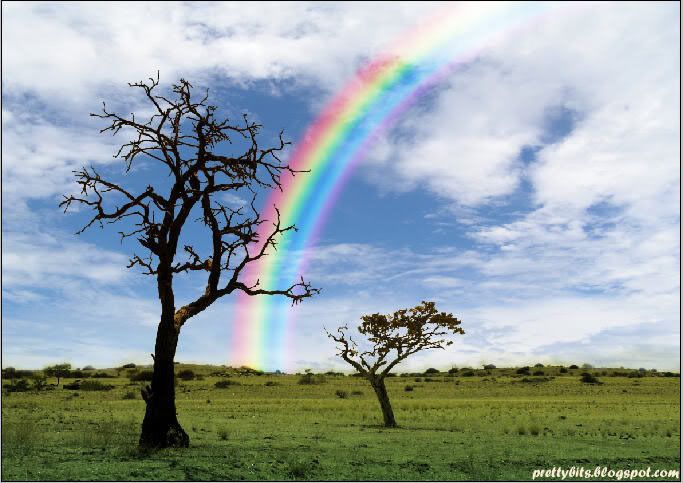
Personally, snapping a decent picture of a rainbow has never been an easy task for me. Each time I see a rainbow in the sky, I would either be without my camera or that the rainbow would be almost completely immersed and shielded by the clouds by the time I manage to pull my camera out of my bag without causing my make-up and ipod to fall out of the bag. After failed attempts to snap pictures of a nice rainbow, I decided that I shall try my luck at creating my own.
Follow this guide and you will have your own rainbow too!
Pictures used are obtained from Stock.Xchng. Program used: Photoshop CS2.
Step 1: Starting the rainbow
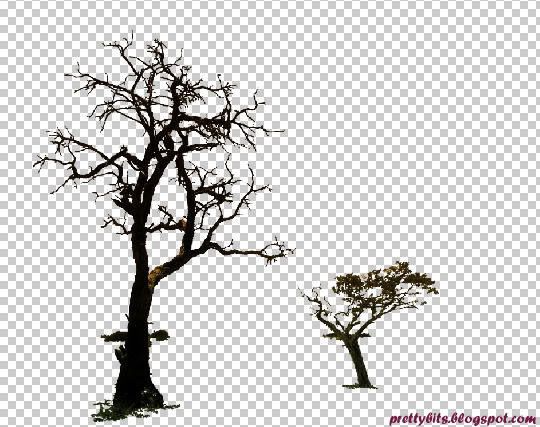
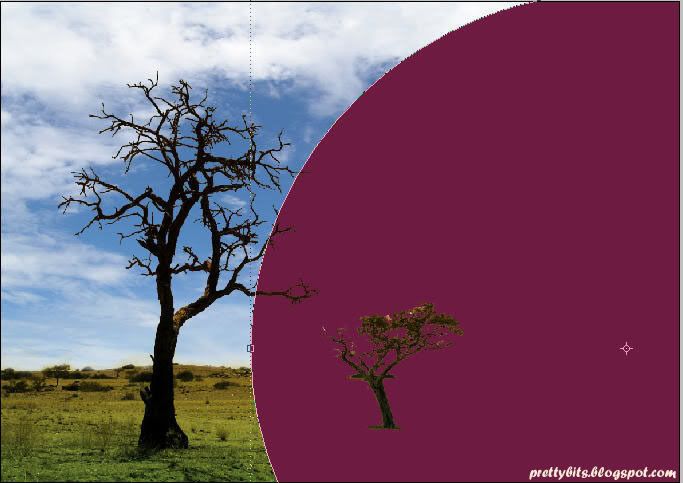
- Grab the Magic Wand tool and select the big tree.
- Zoom in on the big tree, holding down the SHIFT key, click on parts of the tree that was not selected by the Magic Wand Tool.
- Still holding down the SHIFT key, repeat the process on the small tree.
- When you have selected enough of the trees, right click and select Layer via Copy.
- A new layer will be created with just the trees that you have selected.
Step 2: Re-arranging the trees layer
- Drag this new layer to the top of the Layers palette, making sure that it is always the top-most layer.
- Double click on this layer in the Layers palette and rename the layer to 'Trees'.
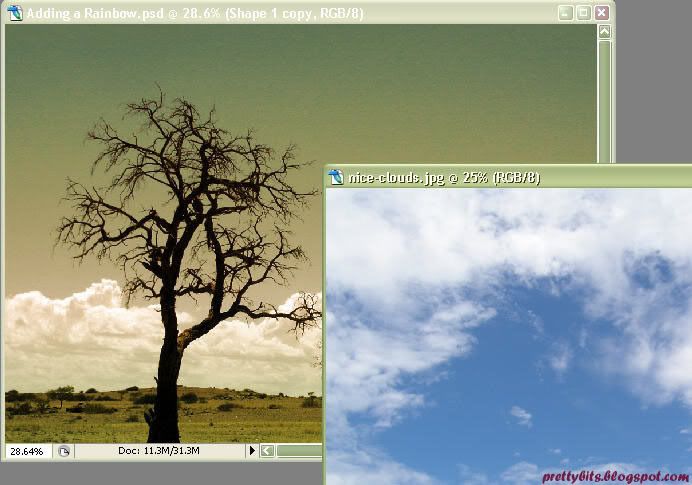
- Choose a picture of the sky with nice clouds and open it in Photoshop.
- Drag the clouds picture into the current composition of Background and 'Trees', making sure that that the clouds are positioned under the 'Trees' layer but above the 'Background' layer.
- Transform and resize the clouds to be just above the height of the existing sky.
- Name this layer 'Sky'.
 Step 4: Add a Layer Mask
- Click on 'Add Layer Mask' icon at the bottom of the Layers Palette and add a Layer Mask to 'Sky'.
- Select the Brush tool with Black as your foreground color, paint out the sky over the ground.
Step 5: Stroke of a rainbow
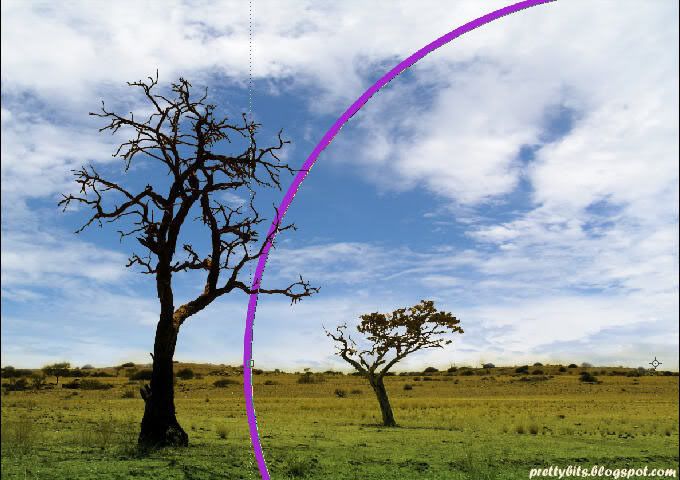
- Grab the Ellipse tool from the toolbar and draw a large oval.
- Now we need to add a layer style. Select Layer > Layer Style > Blending Option.
- Change the Fill Opacity to 0%.
- Click on the category Stroke and add a 25 pixel stroke to the ellipse. At the same time, change the color of the Stroke to 'Purple'.
- Rename this layer to 'Purple'.
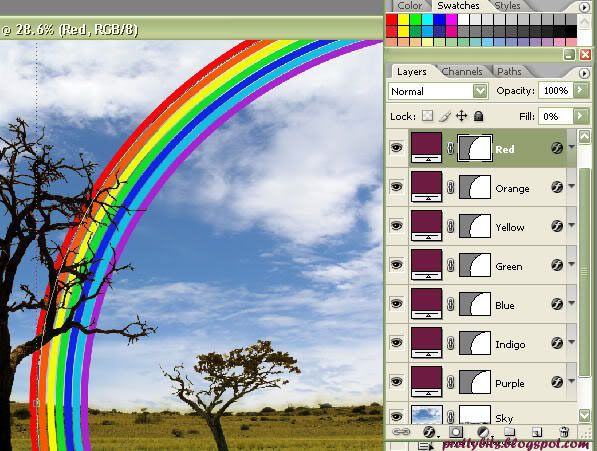
Step 6: Adding all 7 colors of the rainbow
- Right click 'Purple' and choose Duplicate this layer.
- Rename this new layer 'Blue'.
- Selecting 'Blue', hit Ctrl+'T' and lock the transformation aspect ratio by clicking on the 'link' between the percentages.
- Resize layer 'Blue' by changing the percentage to 102%.
- Use method described in Step 5 to change the color of stroke to blue.

- Now, do the same for all 5 other colors of the rainbow.
- You should end up with this...
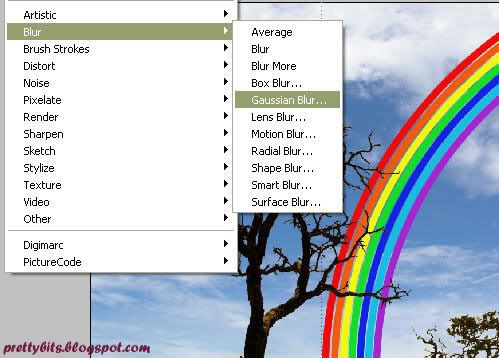
 Step 7: Blending the colors of the rainbow
- Now that we have all 7 colors of the rainbow, we just need to blend them all together to make it more realistic.
- Merge all 7 rainbow color layers by holding down the Shift key and clicking on all 7 layers; right click and select Merge Layers.
- To blur the rainbow: Still selecting the newly merged rainbow layer, go to Filter > Blur > Gaussian Blur and add a 15 pixel blur to the image.

Step 8: Fitting the rainbow to the background
- Use the Eraser tool to erase the section of the rainbow that is overlapping the grass.
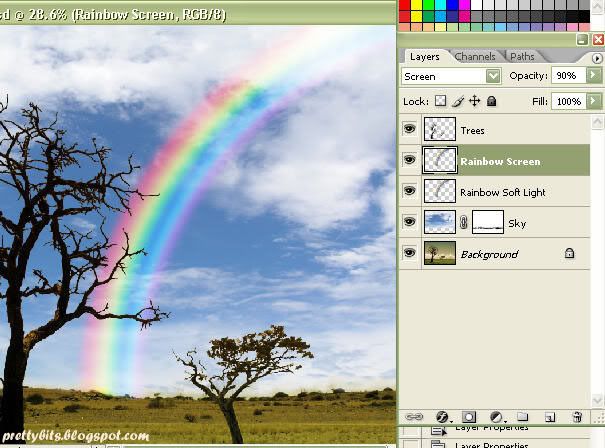
- From the Layers palette, change the Blending mode to 'Soft Light' and Opacity to 50%.
- Duplicate this layer and change the Blending mode to 'Screen' and Opacity to 90%.
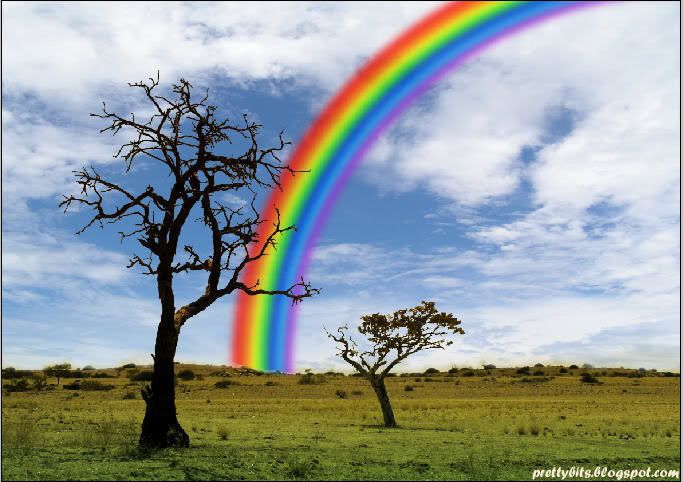
Step 9: Correct the color of the grass
- We're almost there!
- Notice the color of the grass in the 'Background' layer looks somewhat sluggish against a rainbow and blue sky backdrop? Let's change that!
- Select the 'Background' layer. Go to Image > Adjustments > Hue/Saturation and change the Hue/Saturation as shown....

Viola!!!!!! Here's your very own Rainbow Effect!!
I hope you enjoyed this little tutorial. Check back for more Weather Series.
![]()
![]()
![]()
![]()
![]()
![]()
![]()


2 Comments:
Hi Pretty Bits Blog, A secret forum has been launch for the girls..... Do join us at GirlsOutLoud.com.
P.S I love your Photoshop Tutorial and Blog.
Babe!! I LOVE this post!!!
Post a Comment